Hinsley Documentation
SAML SSO Setup
This guide walks through configuring SAML-based Single Sign-On for your Hinsley account. SAML SSO allows your team members to authenticate using your organization's Identity Provider (IdP), such as Microsoft Entra ID, Okta, OneLogin, or any SAML 2.0-compatible provider.
Prerequisites
- A Hinsley account on the Enterprise plan
- Admin access to your Hinsley account
- Admin access to your organization's Identity Provider
Step 1: Navigate to the SAML Configuration Page in Hinsley
- Log in to Hinsley as an account administrator.
- Open the account admin area by clicking on your avatar in the top right and selecting Account Admin.
- Select the Authentication tab to access the SSO configuration pages.
- Click the SAML tab at the top of the page.
Step 2: Enable SAML Authentication
- In the Account SAML Authentication dropdown, select Required for all account users.
- Scroll to the bottom and click Save.
- Once enabled, Hinsley will display your SAML Metadata URL at the top of the form. This URL provides your IdP with Hinsley's Service Provider (SP) metadata. You can copy the URL to paste into your IdP's configuration or download the metadata as an XML file to upload to your IdP.
Step 3: Register Hinsley as a Service Provider in Your Identity Provider
You will need to register Hinsley as an application/service provider in your IdP. The specific steps vary by provider, but the general process is the same.
Most Identity Providers allow you to import Service Provider metadata, which automatically configures the required settings (Entity ID, ACS URL, etc.). Use the SAML Metadata URL displayed on the Hinsley SAML configuration page, or download the metadata XML file and upload it to your IdP.
Microsoft Entra ID (Azure AD)
- In the Azure Portal, go to Microsoft Entra ID > Enterprise applications > New application.
- Select Create your own application, give it a name (e.g., "Hinsley"), and choose Integrate any other application you don't find in the gallery (Non-gallery).
- Once created, go to Single sign-on > SAML.
- Click Upload metadata file and upload the metadata XML file downloaded from Hinsley. This will automatically populate the Entity ID and Reply URL. Click Save.
- In the Attributes & Claims section, configure the claims mapping (see Attribute Mapping below).
- In the SAML Certificates section, download the Federation Metadata XML file. You will upload this to Hinsley in the next step.
Okta
- In the Okta admin console, go to Applications > Create App Integration.
- Select SAML 2.0 as the sign-in method.
- When configuring the SAML settings, upload Hinsley's metadata XML file or use the metadata URL to automatically populate the SSO URL and Entity ID fields.
- Configure the attribute statements (see Attribute Mapping below).
- After completing the setup, navigate to the Sign On tab and download the IdP metadata or copy the Metadata URL.
Other SAML 2.0 Providers
Consult your IdP's documentation for adding a custom SAML application. Most providers support importing SP metadata via URL or file upload — use Hinsley's SAML Metadata URL or downloaded metadata file to configure the integration.
Step 4: Configure Hinsley with Your IdP's Information
There are two ways to configure the IdP details in Hinsley:
Option A: Upload IdP Metadata (Recommended)
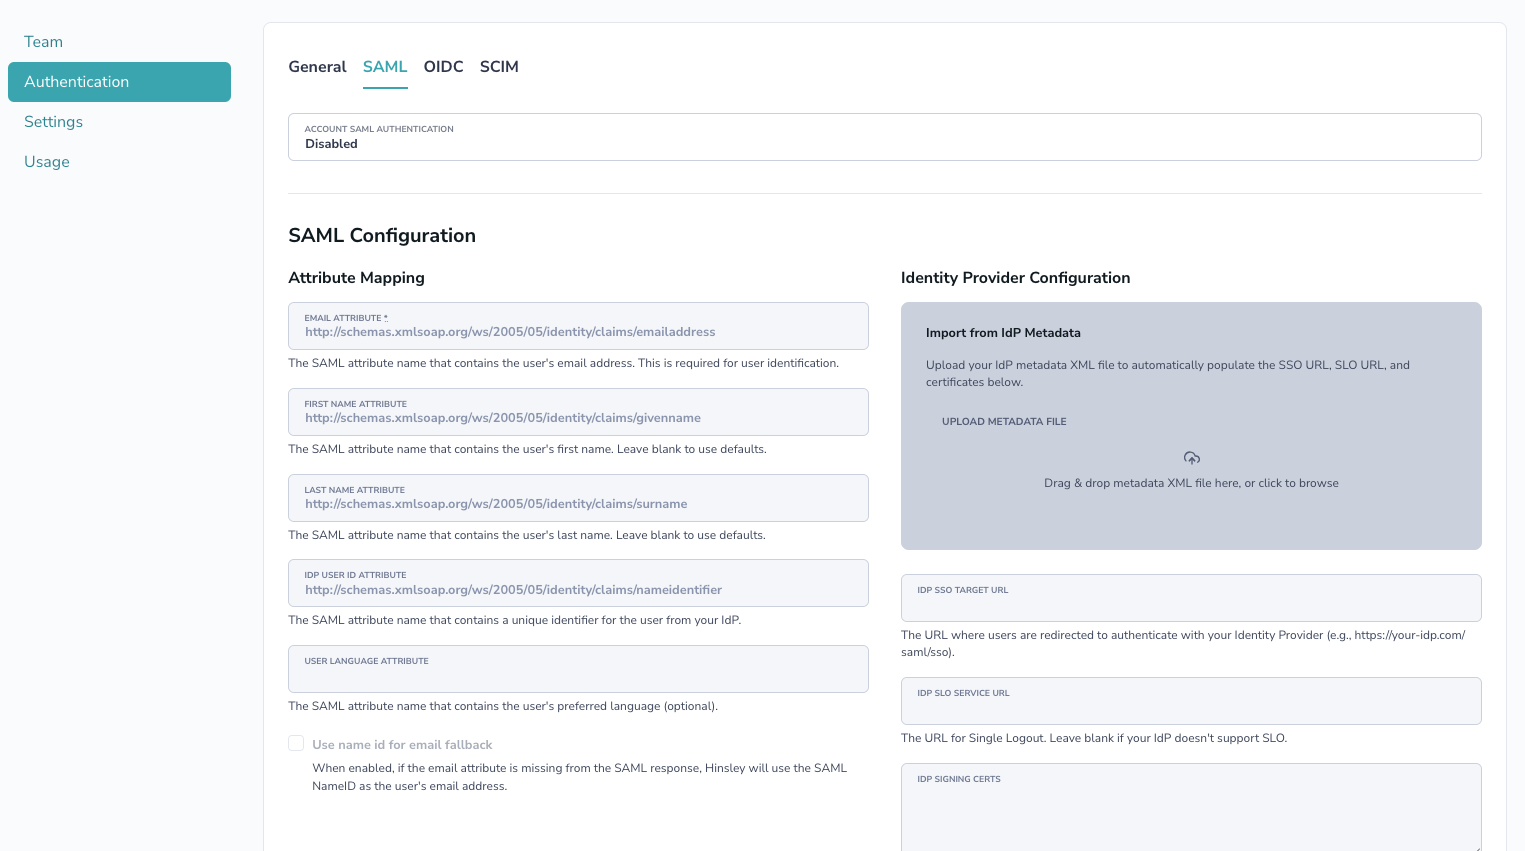
- On the Hinsley SAML configuration page, find the Import from IdP Metadata section on the right side.
- Upload your IdP's metadata XML file by dragging it into the upload area or clicking to browse.
- This will automatically populate the SSO URL, SLO URL (if available), and signing certificates.
- Click Save.
Option B: Manual Configuration
If you cannot obtain a metadata file, you can configure the fields manually:
| Field | Description |
|---|---|
| IdP SSO Target URL | The URL where Hinsley redirects users for authentication |
| IdP SLO Service URL | (Optional) The URL for Single Logout, if your IdP supports it |
| IdP Signing Certificates | The PEM-encoded X.509 certificate(s) your IdP uses to sign SAML responses. Paste the full certificate including the BEGIN and END headers. Multiple certificates can be pasted together. |
| IdP Encryption Certificates | (Optional) PEM-encoded certificate(s) for encrypting SAML assertions. Usually not required. |
Attribute Mapping
Hinsley expects certain user attributes from the SAML response. You can change these on the Hinsley SAML configuration page to match your IdP's attribute names.
| Hinsley Attribute | Default Claim URI | Required | Description |
|---|---|---|---|
http://schemas.xmlsoap.org/ws/2005/05/identity/claims/emailaddress |
Yes | The user's email address. Used for user identification. | |
| First Name | http://schemas.xmlsoap.org/ws/2005/05/identity/claims/givenname |
No | The user's first name. |
| Last Name | http://schemas.xmlsoap.org/ws/2005/05/identity/claims/surname |
No | The user's last name. |
| User ID | http://schemas.xmlsoap.org/ws/2005/05/identity/claims/nameidentifier |
No | A unique, immutable identifier for the user from your IdP. Used for matching users across sessions. |
| Language | not set by default | No | The user's preferred language. |
Microsoft Entra ID Claims Configuration
When configuring claims in Microsoft Entra ID, set up the following attribute mappings:
| Claim Name | Source Attribute |
|---|---|
http://schemas.xmlsoap.org/ws/2005/05/identity/claims/emailaddress |
user.mail (or user.userprincipalname) |
http://schemas.xmlsoap.org/ws/2005/05/identity/claims/givenname |
user.givenname |
http://schemas.xmlsoap.org/ws/2005/05/identity/claims/surname |
user.surname |
http://schemas.xmlsoap.org/ws/2005/05/identity/claims/nameidentifier |
user.objectid |
Step 5: Assign Users in Your Identity Provider
Before users can log in via SSO, they must be assigned to the Hinsley application in your IdP.
- Microsoft Entra ID (Azure AD): Go to the Enterprise application > Users and groups > Add user/group, and assign the relevant users or groups.
- Okta: Go to the application's Assignments tab and assign users or groups.
Step 6: Test the Configuration
- Open a new browser window (or incognito/private window).
- Navigate to your Hinsley login page.
- You should see a Login with Single Sign-On button. Click it.
- You will be redirected to your IdP's login page. Authenticate with your credentials.
- After successful authentication, you will be redirected back to Hinsley and logged in.
Disabling SAML
To disable SAML:
- Navigate to the SAML configuration page.
- Change the Account SAML Authentication dropdown to Disabled.
- Click Save.
When SAML is disabled, all users who were authenticating via SAML will be switched back to password-based authentication. They will need to use the "Forgot Password" flow to set a password.